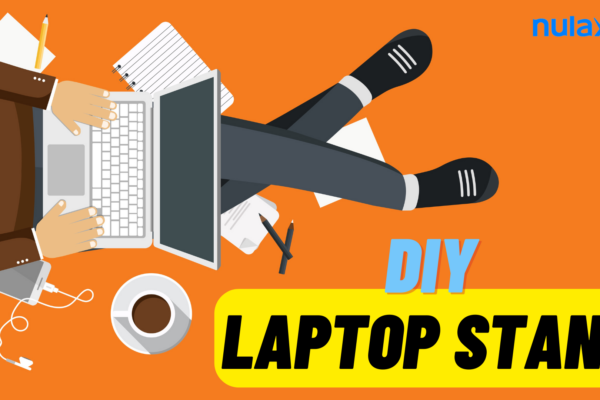


Introduction
One of the most frustrating things about laptop computing is the lack of ergonomic setup options. If you want to work for an extended period, you have to either keep your laptop flat on a desk or put it on your lap and deal with the heat. You can buy a stand or build one yourself. There are tons of DIY laptop stand ideas out there and lots of them use common items to get the job done, so let’s take a look at some good ones that will help you keep your computer cool, comfortable, and safe!
Why Build Your Laptop Stand?
All laptops are getting thinner, lighter, and more powerful. And yet they’re also harder to keep cool.
They’re also harder to keep stable on your lap when you type or play a game.
And they’re often louder than we wish them to be.
Keep Your Laptop From Overheating

Your laptop is hot. You can feel it in your hands, and it’s noticeable when you put your laptop on a table or other flat surfaces. Your wrist gets sweaty from holding onto it for too long. The longer you use your laptop, the hotter it feels and the more likely it is that you’ll damage your computer by overheating its components. That’s why using a stand to prop up your laptop while working can help keep things cool—and protect against overheating damage!

Cardboard is the perfect material for making a laptop stand. The only problem with this is that cardboard always ends up getting eaten by pets if you leave it out. So, if you have a pet and you want to keep your laptop safe, this will not work.
A better solution is to make your DIY cardboard laptop stand from scratch. This way, you can be sure that your laptop will be safe and sound.
2. Materials Needed:
Cardboard Boxes – You can find cheap cardboard boxes at any dollar store or big box stores like Walmart, Target, or Kmart. You can also use old cereal boxes or other boxes that are similar in size and shape to the ones in your home!
Scissors – You need scissors to cut the box down into smaller pieces of varying widths and lengths.
Glue Gun – A glue gun is used to glue together two pieces of cardboard so they stay together while being transported around on your desk or countertop.
1. Get your cardboard and cut out a base. This will be the stand for your laptop. Make sure that the size of the base is large enough to fit your laptop in.
2. Cut some strips of paper and glue them together to make a protective cover for the top of your stand. This should be a little bigger than your laptop so that it can rest on top of it securely.
3. Glue the strips together so that they are all attached at one end, then use tape to hold them in place until they dry completely (or you can use foam boards).
4. Once dry, put some sandpaper down on top of it and smooth it out as much as possible before adding your laptop to it!
- PVC Laptop Stand
A PVC laptop stand is an easy way to make your laptop stand for your desk. If you’re looking for a no-fuss design, this one will do the trick!
- First, cut 12” of PVC pipe using a hacksaw.
- Next, glue four pieces of pipe together into a square shape with hot glue (this will be the base of your stand). Make sure that there’s some space between each piece so that when you add another layer, later on, it won’t fall apart!
- Then take 2” and 2 1/2” PVC pipes and use them to create an upside-down V-shape at one end of your square base (this creates a notch where you can place your laptop). Drill holes in each end and set them aside while we work on our next step.
- 3. Aluminum Laptop Stand

An aluminum laptop stand is a simple, straight-to-the-point way to raise your laptop off the surface of your desk so that you can type more comfortably.
Here’s what you need:
- A piece of aluminum (a soda can or the back of a credit card works just as well)
- Some scissors or a utility knife
How to make it:
- Cut out two strips of aluminum that are 1 inch wide and 4 inches long, so they fit around the width of your laptop. You should also have an extra inch on each end for folding over onto themselves later on. If you’re using old credit cards or soda cans, try to find ones without any logos printed on them—it will look nicer when you’re finished if there isn’t any writing visible from all angles!
- Bend each strip into an “L” shape so that it fits snugly around one side of your laptop; use tape (or glue) if necessary to keep things in place while working with both hands at once–you’ll probably want one hand free for cutting/folding! Now wrap one end under then over again until just before meeting up with itself; this creates two wings where each wing now has three layers: the first wing is made from two layers which include glued material sandwiched between them plus the top layer which includes glued material sandwiched between first wing’s bottom layer plus second wing’s top layer
DIY Bubble Laptop Stand
Are you looking for something unique? The bubble laptop stand is an excellent choice because it is both stylish and affordable. You’ll need 16*16 sheets of 18 acrylic, a laser cutter, and a heat gun, among other things. Both sides of your acrylic must have the protective covering removed. Close the lid and place it correctly in the laser cutter. Making these simply dress up your laptop stand, makes it less dull, and gets you ready for work.
Books as Laptop Stand
Books are a great material to use when building a DIY laptop stand. They’re cheap, easy to find, and can be cut and drilled for your specific needs. Plus, they’re sturdy enough to support your laptop!
You can use books from the library or your bookshelf; just keep in mind that if you live in an area with cold winters or summer heat waves (or both!), then you should probably only use paperbacks or hardcovers that won’t buckle under pressure. If you don’t want any of the words on a book’s pages showing through, consider covering them up with some sort of paint or paper before putting it together as a base—and always double-check what’s inside before deciding whether it’ll work well as a stand!
Bamboo Laptop Stand
The bamboo laptop stand is a simple and cost-effective project. It requires very little effort to finish, making it ideal for novices. The procedure entails measuring, cutting, and gluing various parts without the use of complex tools.
You can remove the outer shell for a softer feel and a more premium appearance. Because it’s not robust enough to tote around, this laptop stand is best used in a home office.
Shoebox Laptop Stand
A DIY laptop stand is an easy way to make sure that your laptop stays upright and in the right position. This can be done with any small cardboard box and some tape or glue.
You need:
One small cardboard box (ideally a shoebox)
Scissors
Glue gun or double-sided tape
Instructions:
Cut off one end of the box so that it is flat and not curved. Tape this end to the side of your laptop so that it is facing up and not facing down.
Next, cut out two holes for your legs on the bottom of the box. These should be about 2 inches from each side of the box and about 1 inch from each side of your laptop so that they are centered on both sides of your computer. Now you can place your laptop into its new stand!
Laptop Stand for Bed

I suggest this bed laptop stand to help you relax and feel more at ease in your bed. This is all about having a comfortable, level surface to type on in bed. Wooden lap desk top, foam square, fabric (13 to 12 yards, depending on lap desktop size), trim, scissors, fabric adhesive, staple gun, staples (make sure they are shorter than your lap desktop), wood stain, and brushes are all required materials (optional). This lap desk is extremely nice, and you can make one yourself.
Laptop Stand Using Scrap Wood
Another wonderful option for laptop stands is scrap wood; make this laptop stand and your neck and back will thank you. These could also be used as a gift. To make these, use a miter saw to cut the 14 and 13 boards according to the cut list, then use wood glue and finish nails to join one 1′′ x 3′′ board to the 1′′ x 4′′ board at a straight angle. Making anything out of wood is more dependable because it lasts longer.

You can make a custom laptop stand for cheaper than buying one.
You can make a custom laptop stand for any laptop, no matter the size or weight, as long as you’re willing to put in some elbow grease. And you can use these DIY desktop stands for just about anything: watching videos, browsing the web, typing up an essay (or whatever it is you kids are writing these days). The possibilities are endless!
This type of DIY project is also great if you have limited funds and don’t want to spend money on something frivolous like an expensive piece of furniture or equipment. You could even use recycled materials from around your home if need be!
Conclusion
Keeping your laptop at a good viewing angle is a very important ergonomic consideration when you’re going to be working on it for many hours. While there are plenty of off-the-shelf options, we think making it yourself can be just as fun, and more economical. So why not give one of these DIY laptop stands ideas a try?
How to Make Laptop Stand from a Shoe Box